

What is Jetpack – Know everything about it?
Jetpack is a completely free WordPress plugin presented by Automattic, the organization behind WordPress.com. While, it may seem modest but it is loaded with several features for your website. All the features are referred to as modules in the Jetpack plugin plus they can be switched off or on as per your requirements. Every module of this plugin is autonomous and contributes an additional feature to your website. With the use of Jetpack plugin, you can stop yourself from setting up needless plugins to your website for several other functionalities.
Amazing Features of Jetpack WordPress Plugin
Jetpack is available with several modules which you can easily disable and enable by yourself. As mentioned by powerhoster.com, they are infrequently introducing new features. Some of them are listed below-
- com Stats: this is a perfect way to see your blog’s analytics. You can employ this together with Google Analytics.
- Carousel: this Jetpack module will allow you to change your normal image gallery to a full-screen and great experience.
- Website-Uptime Monitor: Jetpack 2.6 version has newly added features which will test your site uptime after 3 minutes.
- Widget Visibility: this is a wonderful feature which will allow you to control the visibility of your widget. This is extremely helpful to perk up the conversions on your blog.
- Auto-Publicize Feature: these feature will allow you to automatically share your recent blog post on different social networking website such as LinkedIn, Facebook, Twitter, plus several others.
- Mobile Theme: this feature will make your blog compatible for mobile by providing a responsive design.
- Google Authorship: this module allows users to rapidly add Google authorship for their blog in WordPress. the great thing regarding this feature is that it works greatly with multi-authored WordPress blogs.
- VaultPress: it is one of the finest WordPress backup solutions which are presented by Automattic. With Jetpack plugin, you can rapidly install VaultPress and have a safe backup of your website.
- Subscriptions: This is the great feature of Jetpack plugin. This feature allows your reviewer to swiftly subscribe your blog to get updates through a checkbox in the comment section. In the interim, there is a bit control over bulletin sending in the plugin, however it is yet extremely helpful. Subscription feature aids to motivate viewers to revisit your blog.
- Jetpack Comments: you have the authority to disable the default commenting system of WordPress for commenting system, which allows social-media logins. Well, we don’t admire this commenting system completely, so it’s very helpful to have a social-login feature on your commenting forms. Basically, there are several other features provided by this plugin such as the capability to include a Twitter sidebar widget, or else you can include some fast social-media sharing buttons. Jetpack plugin is said to be one of the most important plugin for your website or blog in WordPress.
How to Configure the Jetpack Plugin for WordPress
Step 1 – visit the ‘Add Plugins’ area of your website and then search for Jetpack plugin. Due to its recognition, you can find it on the very first page. After that you need to click on ‘install now’ button for start the installation process of the plugin.
Step 2 – as soon as the installation is finish, you need to click on the option ‘Activate’.
Step 3 – as soon as you activated the plugin, you will be told to connect it with WordPress.com. In case you do not have your account in wordpress, then you can open it.
Step 4 – when you open your WordPress account and log-in to your account, you need to revisit the previous window and click on the option ‘Connect to WordPress.com’.
Step 5 – now, you will be asked to verify your step to connect your website with the services of WordPress.com. To get started, you need to click on the option ‘Approve’.
Step 6 – after approving the connection, the plugin will try to approve your site with WordPress. As soon as it successfully get authorized, it will ask you to select your preferred plan.
Step 7 – you can see feature-comparison on the same web page and select whatever plan you think would be good for your website. If you want to select a plan, then you need to click on the ‘start-with’ button.
Step 8 – after that, you will be redirected again to your site with a jump-start window for activating the suggested Jetpack features. Now you need to click-on the button ‘Activate-Recommended-Features’. Well, now your Jetpack plugin has been activated successfully with all the suggested features. Now we are moving on the installation process.
How to install Jetpack
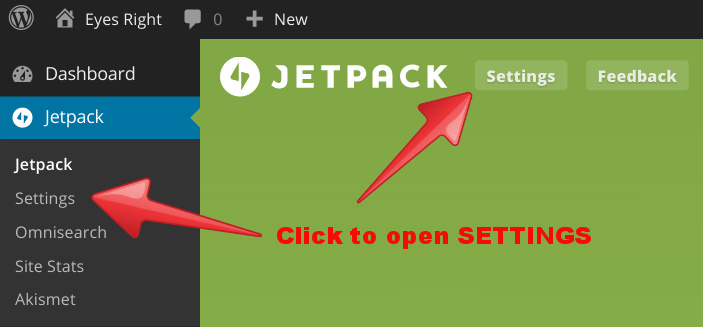
Step 1 – go to the settings page of Jetpack plugin with the use of toggle.
Step 2 – there you will see the writing settings tab. There you will need to enable the toolbar of WordPress.com if you can use it easily rather than the default admin bar of your website.
Step 3 – Now, you should scroll-down to the ‘Composing’ region. You can activate the ‘Write pages or posts in plain-text Markdown syntax’ feature if you’re already used to markdown. Generally, markdown is employed by people who need a simple and fast method to write rich content, without learning so many complex shortcuts and codes. You can also activate the feature ‘Check your grammar’, style, and spelling’. It will greatly help you in proofreading.
Step 4 – now, visit the ‘Media’ section and activate the feature ‘Speed up photos and images’. This feature will aid you to offload the images to the server of WordPress.com and then the images or pictures will be catered from their international CDN to the visitor of your website. This’ll aid you to lessen the usage of your bandwidth and accelerating the loading time of your website. To get the perfect performance, activate the ‘Display galleries and images in full-screen, gorgeous browsing experience’ features.
Step 5 – under the segment ‘Custom-Content Types’, you need to activate the features like ‘Portfolio’, and ‘Testimonials’ if you wish to include and show them on your website to your prospective consumers.
Step 6 – under ‘Theme enhancements’, you need to activate the endless scroll feature if you want. It takes the upcoming posts automatically into sight when the viewer reaches the ending of the page. Several magazine and news websites have enabled this module to boost the possibility of viewers remaining on their website for a longer period of time. This sequentially decreases the bounce-rate of your website and it is great for search engine optimization.
Now let’s have a look at the option ‘Optimize your website for mobile-phones’, you can switch it on if your website’s theme is not responsive for mobile phones or if you wish a light-weight and simple theme for your website when the same is loaded from mobile phones. If you want to enable the option of mobile theme, ensure that you’ve turned on the ‘Show featured images’ and ‘Use excerpts’ option as well.
Step 7 – you can switch off the module ‘Post by email’ if you don’t employ e-mails for publishing posts on your site.
Step 8 – after finishing the configuration of the ‘Writing’ settings, you need to head to the tab named ‘sharing’. Switch on the option ‘Publicize connections’ and then click on the link ‘Connect-your-social-media-accounts’.
Now you will be redirected to a sharing settings screen on WordPress, where you can handle your connections. Here you can easily connect all your social networking accounts to Jetpack and always you can post a new article on your blog, and then you can select it to be automatically shared to all the connected networks. This will help you to save your time if you daily blog and share your post manually to Twitter and Facebook.
Step 9 – if you’re making use of social sharing plugin already on your website, then you can leave this step. However, we suggest you to uninstall the sharing-plugin that you are using already and then click on the check-box button to activate ‘Sharing buttons’ module. After that, next step is to click on the link ‘Configure-your-sharing-buttons’ for adding to removing different sharing buttons.
Step 10 – if you’re thinking about approaching to self-hosted WordPress, then you’d possibly understand the meaning of ‘Like’ button. You can only advised this option if there are so many followers on your WordPress account. Also, be informed that a person can like your post in case they have their account on WordPress – it is similar to a like button of Facebook however it is for WordPress.
Step 11 – now, it’s time to head to the ‘Discussion’ area. Well, you should switch on the module ‘Comments’ as it seems great as compared to default comment box in WordPress. it gives the viewers an alternative to comment on your posts with the use of their social networking profiles like Google Plus, Twitter, and Facebook. Also, it enables you to show Gravatar-Hovercards over the user’s avatar.
Step 12 – if you scroll down, you can see the ‘Subscriptions’ feature. You need to immediately enable it to control the WordPress.com’s power to enable your readers and commenters to subscribe your blog. If you choose to enable this option, you can show a subscription-widget on your site. You can also show a comments subscription option under your comments to allow people to prefer getting notified if anyone replies to their comment. One more reasons to use this subscriptions module is that, it assists you increase your list of email subscribers plus it is the considered as the best assets to have online.
Step 13 – now let’s head to the section ‘Traffic’. Now go to the ‘Related-posts’ part and enable the same if it’s not activated already. To get the most optimal performance and best fallout, enable the option ‘Use a large-and-visually-striking-layout’.
Step 14 – if you’re making use of SEO plugin such as All-in-One-SEO-Pack or Yoast, there are increased chances that you’re previously having the needed site verification and XML sitemaps features for your site. If not, then you can simply enable ‘Site verification’ and ‘Sitemaps’ modules.
Step 15 –at last heading to the final section, go to the ‘Security’ tab. The module ‘brute-force-attack-protection’ will be switched on be default. Don’t do anything on this tab and it will safeguard your website from getting striked by bad careless bots which are seeking methods to crack all your login credentials.
Step 16 – by switching on the module ‘WordPress.com log in’, you’ll be capable to steadily login to your website with the use of your WordPress.com account. If needed, you can also switch on 2-step authentication for better security. So, now we have successfully launched the Jetpack plugin on your website powered by WordPress.
Some wonderful reason to Set-Up the WordPress Jetpack Plugin
The enormous amount of WordPress plugins accessible makes it simple to strengthen your site in several different methods. But, doing the same frequently needs setting up numerous plugins, each having its individual particular role to play. This will not only take up your time to identify the perfect plugins for your requirements, it can also inflate your site – decelerating in the process. Therefore should you set up the Jetpack plugin of WordPress and possibly solve most of the problems?
In simple words, Jetpack is a plugin which can play loads of helpful roles in supercharging your website in WordPress. And Jetpack being made by Automattic, you can anticipate it to be constantly developed as well as supported in the longer period.
Improved website functionality
WordPress is a horrid CMS with loads of in-built features. A premium-WordPress theme usually increases that functionality rather, though we also depend on several plugins for giving all the basic features that we need for our sites. To cut-out numerous agents, the Jetpack plugin of WordPress is available with such modules, so you no longer need to set up a new plugin for each latest feature you want for your site.
Statistics and Traffic Growth
With no traffic, your site is basically valueless. The Jetpack plugin of your WordPress identifies this by assisting you to increase your traffic through its Publicize feature. When configured, the feature drives all the latest blog post to social media like Tumblr, Facebook, and Twitter. Moreover, Jetpack automatically issues all the latest content to WordPress site, providing it yet smaller, but striking exposure.

Centralized Site Management
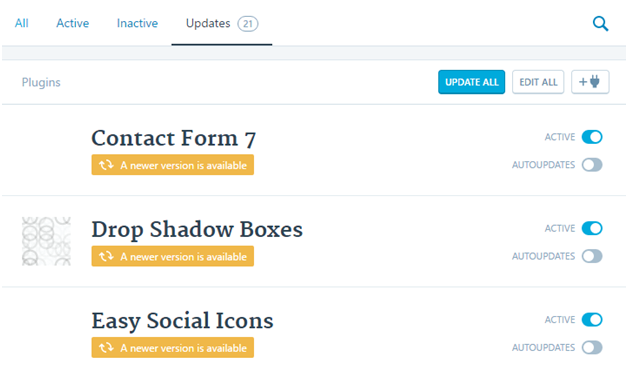
If you operate numerous sites on WordPress, you will understand how much work you have to handle them all. You not just have to sign into every website individually; however you also need to update them separately, as well. Luckily, the Jetpack plugin of WordPress streamlines the procedure of handling numerous WordPress sites with its helpful manage feature. This feature allows the administrators to deal with numerous self-hosted sites in WordPress from a single interface of WordPress.com. More exclusively, you can revise themes and plugins all together –only with a single click – or even allow plugins to revise automatically:
Subscriptions and Comments Made Easy
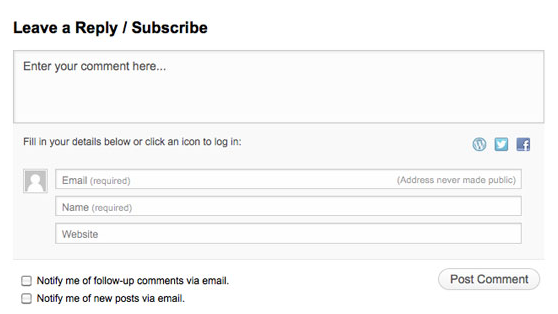
The users of WordPress frequently find themselves requiring plugins to improve comments and make it simple for viewers to subscribe to entire blog or posts. Jetpack looks after it. When you enable JetPack subscription and commenting features, commenters to your website finish up seeing this:
Formerly, this would have taken two or three minimum plugins to achieve. Also, Jetpack makes the configuration process of these options simple. You need to visit various dashboard web-pages to do the same, however pressing the “Configure” button on the front Jetpack page gets you there.
-
Sharing Made Easy
Installing social-sharing buttons on WP website is not the simplest thing to do always. It either needs a plugin, and hard-coding them on your own, or a theme which suits you. Jetpack enables you to include social sharing buttons regarding as effortlessly as any theme or plugin. You can simply drag-and-drop it from a list of pertinent social website out there. Also, you can view a foretaste, plus other alternatives for customization are given. For example, you can also employ the Facebook-Share button instead the Like button, or you can simply have the name of social website spelled out beside the icon if you wish.
-
Grammar and Spelling Help!
This is a great advantage, and this is not the one we hoped to come upon. The Jetpack plugin provides your WordPress set up the power to aid you ignore embarrassing spelling and grammar mistakes. As soon as you have written your content, simply press this button to receive a complete review of your blog post:
Also, you can toggle off or on all of these dissimilar alternatives for what the grammar/spell check system will concentrate on:
Conclusion
Besides, all the above features, Jetpack also facilitates you to watch your website’s downtime, block spam comments, generate short links for blog posts, add Twitter follow button and Facebook page like widget, show social networking profiles on website, and produce contact forms etc. and the best part of the Jetpack plugin is that, all these features are totally free for everyone. Jetpack plugin have loads of features, and it is really a brute with beautiful and neat interface.