
If you are an existing user of WordPress.com, you may have come to a position where you are all set to outrun WordPress.com. You would like to tailor your website themes and install plugins. You may wish to actually begin monetizing your website and be in total control. Well, in that case you are at the correct place. Well, in this post we are not going to talk about the differences among WordPress.org and WordPress.com, instead we will focus on a very important question that a number of people have in their mind: how to translate blog from WordPress.com to WordPress.org? Here, in this guide, we will tell you how you can efficiently move all your content from WordPress.com to WordPress.org. Apart from this, we will also cover how you can keep your search-engine rankings and how you can redirect your current visitors to your newly developed website.
Important things to Consider Before Get Going
You’ll require having a good web-hosting company and a domain-name. We would like to suggest that you use powerhoster.com as they are the leading web hosting service provider for wordpress and they will provide you a free-domain as well as some discount on their hosting plan. Powerhoster is also a publicly suggested hosting provider of WordPress. In case, your WP website previously has a custom domain-name, then you need not to worry at all.
We will also over that. At last you’ll require access to your WP account, so that you can effortlessly transfer all of your comments, images, pages, posts, plus other important data onto your self-hosted WP website. If you want to learn do things on your own, then this guide will be very useful for you. First of all let’s understand the usefulness or significance of WordPress.org.
Why WordPress.org is amazing?
The blogs at WordPress.org are self-hosted which implies that you are accountable for discovering a trustworthy web-hosting firm for your blog in place of depending on WordPress.com, however regardless of that you’ve significantly more control over your website blog and numerous occasions for putting your own mark on it. Let’s take an example. With your individual self-hosted WP blog you can easily show ads, have complete control over the appearance of your blog’s theme, and upload some unique premium plug-ins which will let you to catch subscriber emails or give products for sale. If you wish to lift the steps from WordPress.com to WordPress.org, you possibly wish to have the knowledge of the perfect wat to go. Here is the list of some basic reasons to use WordPress.org.
-
org is Open Source and Completely Free
Different from other “open source” and “free” solutions that have secret plans, WordPress.org is totally free for you. WordPress.org neither begins charging you when you cross certain size, nor does it shut down any of its snippet to you. This is the said to be the less substantial however most significant reason for the success of WordPress.org. In short, there is no nonsense, no gotchas, and No fees with WordPress.org.
-
It is Easy to Add a Blog to WordPress.org Website
WordPress.org has achieved the status for blogging and a number of people consider this as a leading blogging platform. Even WordPress.org itself seems to recognize with blogging first, because the default-setting is for the home-page for being a blog. Besides the incredible progresses in CMS, the functionality of blog is yet said to be the best in the industry. With plugin infrastructure, anti spam solutions, extraordinary moderation controls, widgets, easy theming, gravatars, threaded commenting, tags, and categories, you cannot discover a better solution for your blogs. Adding a blog post to WordPress.org is a wonderful way to draw and engage users, and to keep Google paying interest. If you do not require a complete website, and simply require a fast blog, then check out WordPress.org.
-
Style Your Website with Unique Themes
We advise various business people that their website doesn’t require reinventing the wheel in terms of design. Many web hosting providers or website developers love to do custom web-design for their consumers; however most of them don’t require it. Website designers have been capable to make successful and extremely beautiful websites by beginning from current themes and performing customizations from there. Since themes are open-source, you can simply download or purchase them and after that tailor them to your unique content. Well, personally we advise you to choose folks-at-Elegant-Themes that make superbly powerful and user-friendly themes at affordable price. Just keep in mind that, themes are free from your content, thus you can swap out or modify themes at any time and have your functionality and content ready.
-
Get more Functionality with Plugins
Loads of platforms in the market provide plugin functionality, however we have seen a thorough implementation and more smooth than the plugin effort available at WordPress.org. Plugins let you to include a vast image galleries, maps, forums, shopping carts, sliders, and more great functionality. There is a one-click, and searchable install index of plugins (you can consider App-store for WP). Their snippet is puzzled with “hooks” that facilitate developers to include their snippet to virtually any element of WP without modifying the foundation.
Now, let’s come to the main point. Below we are going to explain step by step process to transfer or move your blogs from WordPress.com to WordPress.org.
Step 1: Export all your content from WordPress.com
To work this out, you will need a WordPress.com blog, full of real content rather than placeholders. As soon as you are logged in to the siet, visit the tab ‘My Site’ and click on the option ‘WP Admin’. Now, you will reach to WordPress Dashboard where you need to discover the tools tab and then the Export option in it. Under this tab, you will see 2 options, 1 option for regular export and another one for a Guided-Transfer procedure. for the moment, simply click on the option ‘Start Export’.
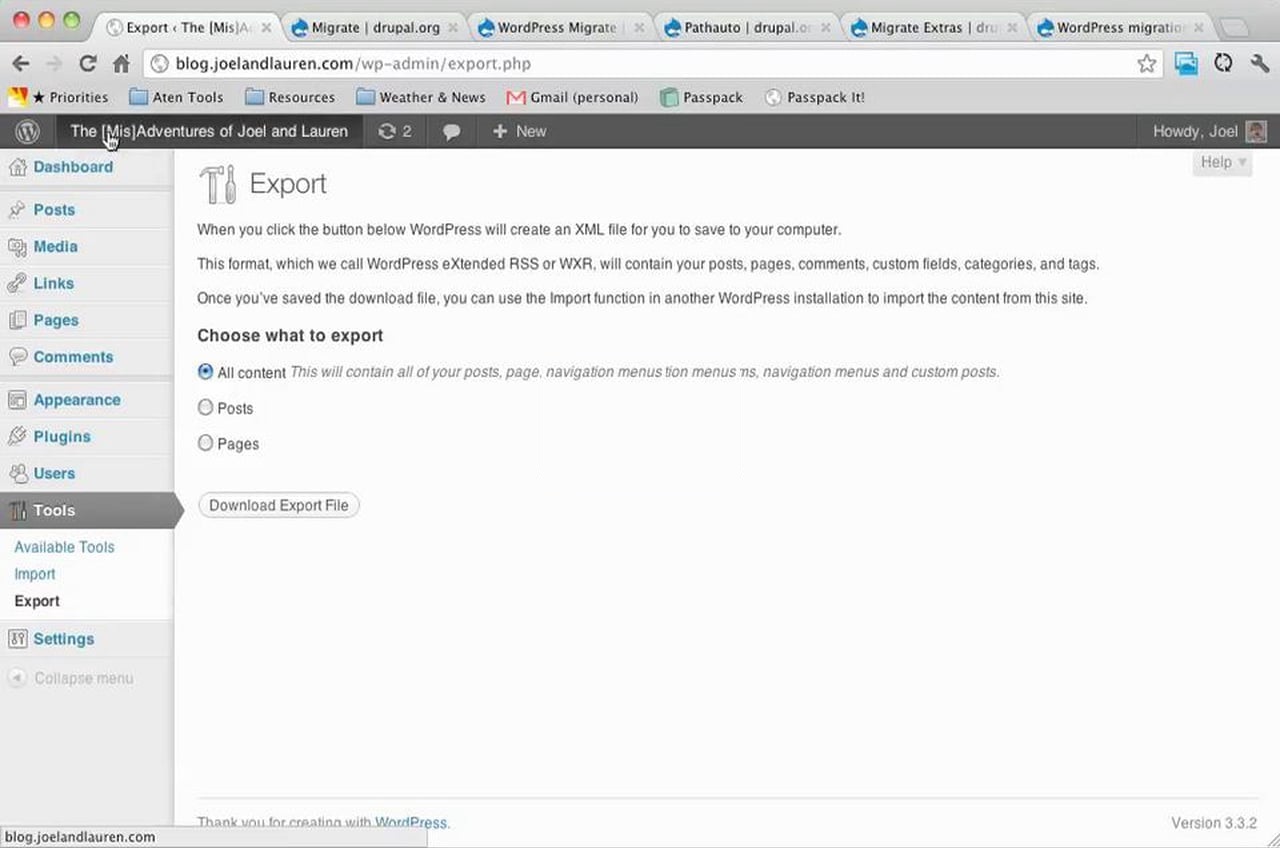
On the next page, a pop up or a message box will ask you which blog you wish to export. Well, you can export media, feedback, testimonials, pages, and posts. You can pick any of the content that you wish to export and then move forward to click on the option ‘Download Export File’. after that, the WordPress.com pixies will begin working on your exceptional XML file, which will be scripted in WP eXtended RSS also known as WXR format, and will have all of the data of your website in a single compact parcel.
Warning: If your export documents happens to go beyond the 32mb threshold, you are about to get into trouble throughout the next steps because of a file limits that can generally be imported into your latest WordPress install. Well, in this case, you will require using a WXR file-splitter for splitting that file into more convenient pieces. It’s not likely this will happen to you, however we think you should be aware of this.
Step 2: Configure the WP Importer on Your New Website
If your export file is geared up, you require getting your new set up prepared for processing it. To do the same, you will need to visit your Dashboard at wordpress.org and then go to the tools option and then go to the Import option. There you will see “Install the WordPress-Importer”, simply select this option for importing tags, categories, custom fields, comments, pages, and posts from WP export file. A new screen will show which displays the ‘WordPress Importer plugin’. We will use this tool to process the XML-file which is created at the time of the final step to get your content migrated. It is basically an official plugin which is designed and developed by the team of WordPress.org. Now you can click on the option ‘Install-now’.
Then a new web page will appear that will confirm that the WordPress-Importer-plugin was downloaded, unloaded and installed with no concerns. Now you will need to click on the option ‘Activate-Plugin & Run-Importer’ for the later step.
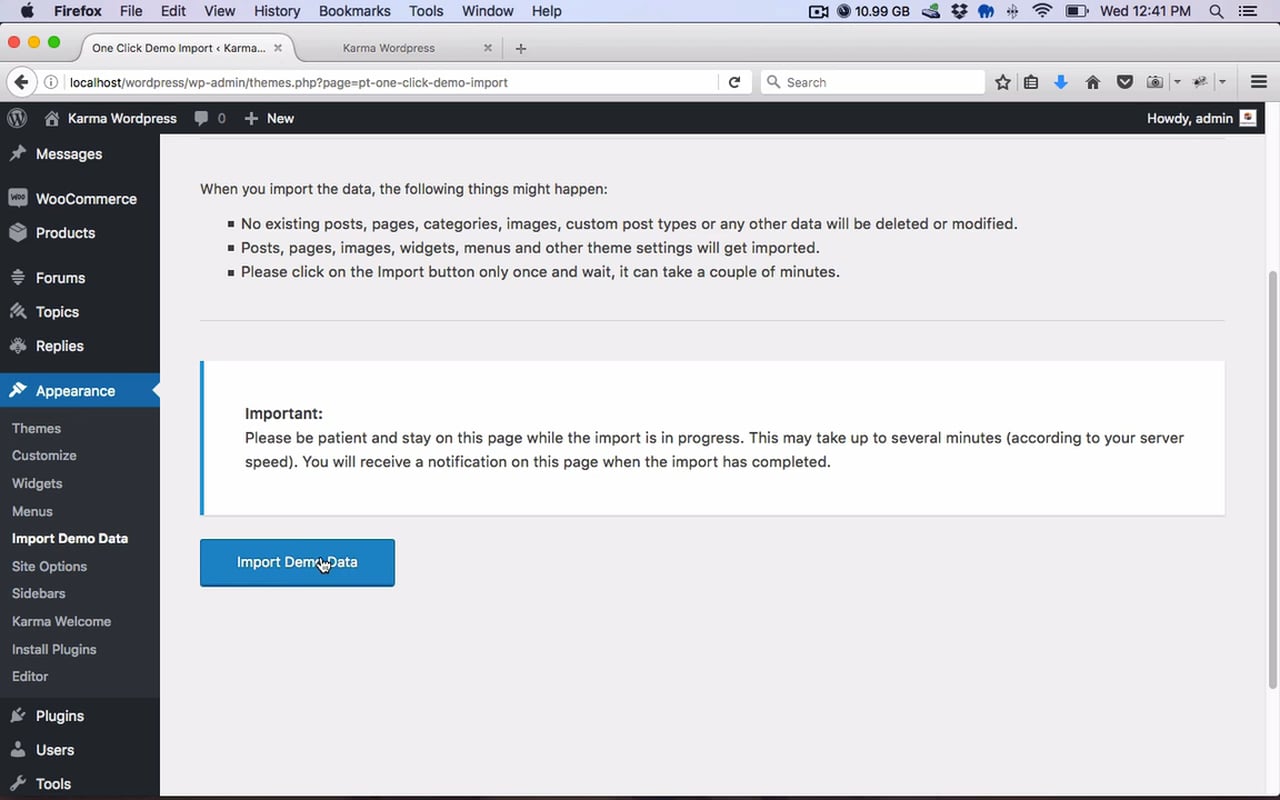
Step 3: Simply Import Your Content
When the WordPress-Importer-plugin get activated and prepared to go, you need to upload your export file from WordPress.com by clicking on the option ‘Upload-file-and-import’ as given below. If some way you got spinned in involving steps, just go to the Tools option and go to the ‘Import tab’ in your control panel and if the plugin is installed already, you will be directly redirected to the import-page.
On another screen, a window will ask you whether or not you wish to reassign your blogs to new authors. For instance, if you published everything under one account in your WP website, you would just have to pick whether to import that exact username or you wish to create new one. Or else, you can also allot posts to a current author on your latest website by selecting from the drop down list.
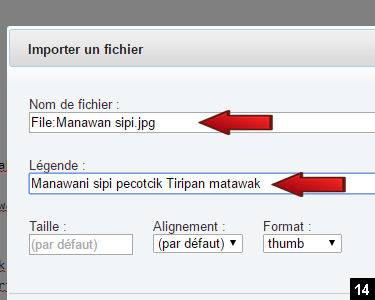
As soon as you finish that, you need to click on the box ‘Download-and-import-file-attachments’. This will fetch all your pictures as well as other files from WordPress.com to WordPress.org. Afterward you need to click on the Submit button. It’s quite challenging to import images, hence it’s important to take a small tour and cross check if everything is running appropriately after clicking on Submit button.
Ensure all the images are in place
This is said to be a component of the migration procedure where most mistakes tend to take place. If you have numerous images at your WordPress.com website, a few of them may not transfer appropriately and you could be faced with the opportunity of requiring updating everything manually. Well, this won’t happen every now and then, but since it has been prone to take place, we are about to show you some handful small plugin which can assist you in this case. Import-External-Images evaluates the snippet of your posts, fetches the complementary pictures of it identifies associated to sources afar your website, then it uploads them into your local configuration and then you are completely transferred.
Step 4: Switch Users to Your Brand New Url
In case you have managed to execute everything the overall 3 steps (including the images), you are close to the end. Actually, the verification window will attentively tell you about everything.
There, at preferred Elegant Themes, we like to be careful, thus we are about to deal with some additional points to cover all the unfinished business of your transfer – the 1st of which is whatever will take place to your earlier WordPress.com website. In the end, if you just transfer without letting your visitors know, you are certainly about to lose them.
There are some methods to handle this concern – the most usual of which would be making the blog post exclusively to tell them you have transferred your site to a new url and show them in that route.
Another option is ti use the paid Site Redirect service of WordPress.com which cost something from 13USD annually, which will totally redirect all the viewers to your new url. If you would like to select this method, you need to visit directly to the ‘Redirect-service page’, which will involuntarily redirect you to your personal account. When you get there, just choose the blog that you wish to transfer, enter the name of your new url and then click on the Go option –
After that, you will be asked to enter your payment details so as to finish your purchase of the desired service and that is it.
Step 5: configure Jetpack plugin by WordPress.com (optional)
This last step is totally depending on your choice, because by now your website should be completely transferred and the redirect problems should have been handled. But, as per our point of view, it is relevant to add it, because the Jetpack plugin basically provides certain amazing features that you might have developed at the time of your stay at your WordPress.com. When it comes to some features, Jetpack plugin can give you with the security from brute force attacks, traffic stats, and accelerate your page load times between other features. But, all these features that can be managed through other plugins that you have received your individual self-hosted WordPress install, hence the option is up to you.
If you choose to stick with the same Jetpack plugin, you just need to visit your plugin tab in your Dashboard and then you need to click on the option Add New: Jetpack has to be one of the first preferences on the upcoming page, thus simply proceed and click on the option Install Now.
Now you will have to click on the option ‘Activate the plugin’ and afterward you will get yourself again on the plugins menu with a large Jetpack notification over the top of your computer screen. Now, just click on the option ‘connect to WordPress.com’ for completing the installation procedure, and then you are geared up. Well, in this post we cannot talk about the process of using Jetpack in detail, but if you want to get such information you can go online and find some informative tutorial regarding the same.
Ultimately, as soon as you have set up Jetpack plugin, you can also easily import your earlier WordPress.com users over to your new website with the use of its incorporated subscription migration tool.
Can I Appoint Someone To Perform Everything
Of course, you can do that. Actually, there are loads of web hosting service provider that provide migration services, either free or paid (if you register for their services firstly). WordPress.com provides a Guided migration program for which they cost a one-time cost of 129 USD for every blog, however only to powerhoster.com.
Since the excitement may be stronger for taking this way, if you tool enough time to take a glance over all the steps then you should’ve learned that the procedure is really very easy. On the poor side you may run into a trouble to import your images into your WordPress.org website, and that can be effortlessly taken care of. Hence, do not be afraid to try it if you believe that you can easily deal with it.
Conclusion
Transferring your website from WordPress.com to WordPress.org may take a small work, however it will quickly bring in a whole galaxy of opportunities when it comes to customization and development, which makes it worth setting up.
Just keep in mind these simple key steps:
- Export all your content from your current website (and think about segmenting it if the ensuing file is huge).
- Configure the WordPress-importer-plugin on your WordPress.org website and employ it to upload all the export documents.
- Ensure that none of your pictures are damaged. In case, any image is damaged, you should employ the Import-External-Images plugin
- Set up the Jetpack plugin plus transfer or redirect your WordPress.com viewers.
Keep in mind that, WordPress.com is an exceptional platform for classroom blogs, but when it comes to have the professional look of the website, nothing can beat WordPress.org.