Install a Plugin in WordPress
You can install a WordPress plugin using the available plugins in WordPress, or upload a premium plugin you purchased or received.
- Log in to WordPress
- Click Plugins.
- Click Add New..
- Pick the following set of steps based on how you wish to install the plugin.
From available plugins
- Using the search bar, search for the name or type of plugin you want to install.
- Click Install Now next to the plugin you wish to use.
Uploading from your local computer
- Click Upload Plugin.
- Click Browse then select the plugin (should be a zip file).
- Click Install Now.

To activate a plugin
- Log in to WordPress.
- Click Plugins.
- Click Add New.
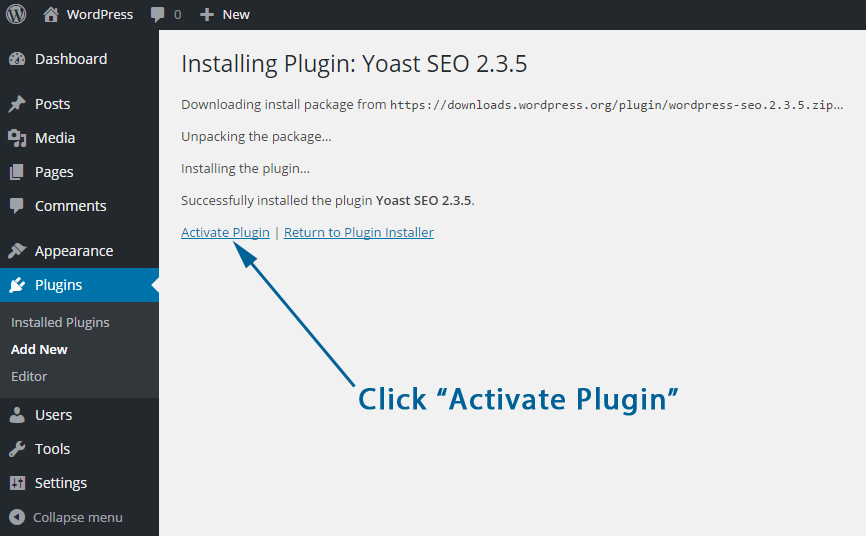
- Search for the plugin you want to use, and then click Install Now.
- Click Activate Plugin.
How you manage and use the plugin depends on its developer. You can view all of the currently installed plugins by clicking Plugins on the menu.
Some WordPress plugins can slow your site’s performance. Deactivating plugins and then testing your site’s performance again can help you troubleshoot speed issues. For more information, see Troubleshooting WordPress.
To Deactivate WordPress Plugins
- Log in to WordPress.
- Click Plugins.
- Select all of the plugins you want to deactivate, and then from the Bulk Actions menu, select Deactivate, and then click Apply.
How To Update And Delete WordPress Plugins Manually
WordPress will let you know when your plugins need updating.
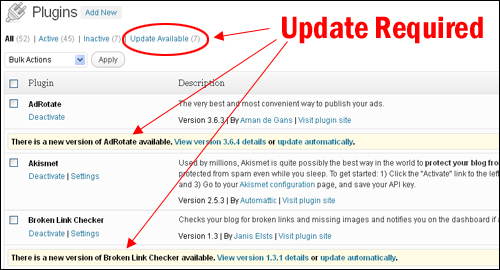
For example, you can see how many plugins need to be updated from your WordPress Dashboard by looking at the “Plugins” menu (in the example screenshot below, 7 plugins need to be updated) …
The “Plugins” section also lets you know which plugins need to be updated and provides links to their download pages, as well as the option to update plugins automatically …

Most of the time, you should experience no problems updating your plugins using the WordPress built-in automatic update feature.
